A CS2 jump throw bind can make a huge difference in ensuring your utility lands where you want it to. Consistency is key in CS2, so setting up a jump throw bind command is definitely worth it to ensure your nades always hit their mark. Plus, you don’t want to risk being called out by your teammates for missing a crucial throw.
What is a jump throw in CS2?
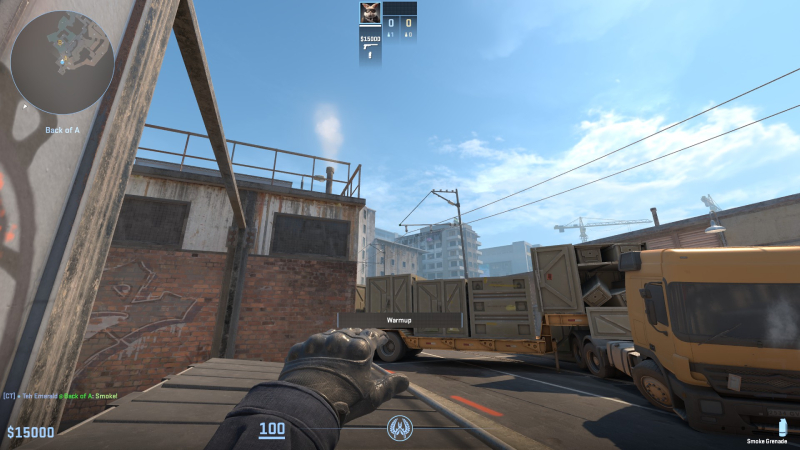
Simply put, a jump throw in CS2 involves jumping while throwing your utility, whether it be smokes, flashes, or anything else. This technique allows your nades to travel further, making them more effective in various situations. Mastering jump throws can even help you fake executes on different parts of the map with well-placed smokes, if you put in the practice.
Credit: Daniel Morris
In CS2, executing a jump throw is more forgiving compared to CS:GO. You only need to jump and throw simultaneously in CS2, whereas in CS:GO, jump throws required precise timing. Despite being less powerful than in CS:GO, setting up CS2 jump throw binds can still help you achieve consistency and avoid embarrassing misses that could cost your team a round.
How to create a CS2 jump throw bind command

Credit: Daniel Morris
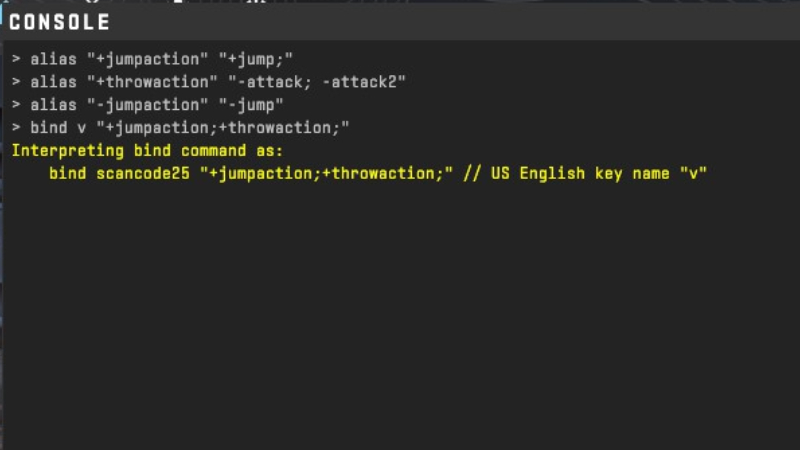
To consistently perform jump throws in CS2, setting up jump throw bind commands is a popular method. By using alias commands in the CS2 console, you can easily bind jump throw to a key of your choice. Simply copy the following commands into your in-game console:
- alias “+jumpaction” “+jump;”
- alias “+throwaction” “-attack; -attack2”
- alias “-jumpaction” “-jump”
- bind [KEY] “+jumpaction;+throwaction;”
Adjust the key in the bind command to your preference, and you’re good to go! While you may need to enter these commands each time you play, it’s a great way to test if jump throwing works for you.
How to create a CS2 jump throw bind config

Credit: Daniel Morris
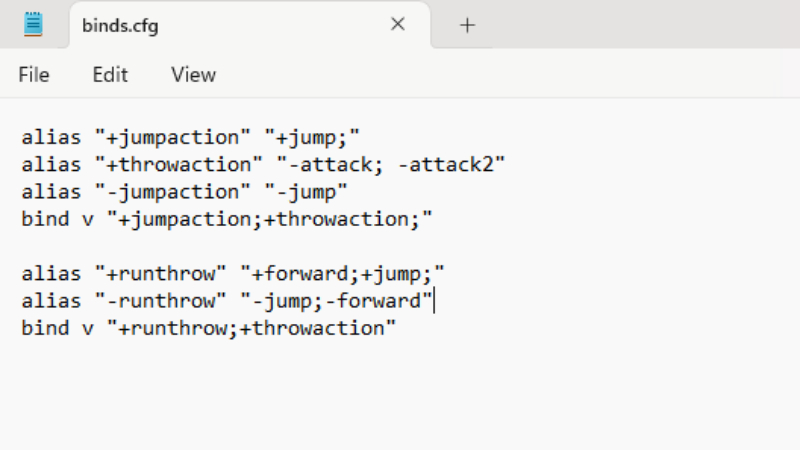
For a more permanent solution, creating a CS2 jump throw bind config is recommended. This method ensures your jump throw bind remains active even after game resets. Follow these steps to set it up:
- Open the folder on your PC “steamapps\common\Counter-Strike Global Offensive\game\csgo\cfg“.
- Right-click in the folder and create a new Text Document.
- Name the document “binds.cfg“, ensuring to remove the .txt file extension.
- Open binds.cfg in Notepad.
- Enter the specified commands in the .cfg file.
alias “+jumpaction” “+jump;”
alias “+throwaction” “-attack; -attack2”
alias “-jumpaction” “-jump”
bind [KEY] “+jumpaction;+throwaction;”alias “+runthrow” “+forward;+jump;”
alias “-runthrow” “-jump;-forward”
bind [KEY2] “+runthrow;+throwaction”
- Customize the keybindings in the commands as needed, with the option for a run and jump throw bind for longer throws.
- Save the file and launch CS2.
- Open the console and type “exec binds“.
- Your jump throw commands should now be active!
For dedicated CS2 players, this method ensures consistency and ease of use for your utilities. Give it a try and see the difference it makes in your gameplay!


