VALORANT Console is now officially available worldwide after being in beta since June, initially released in NA, EU, and Japan regions. With the official release, a wave of new players has joined the game. One common question among fans is how to change their crosshair in VALORANT Console.
How to Change the Crosshair in VALORANT Console?
Since the limited beta release of VALORANT on console garnered positive feedback, the game’s accessibility to players of all levels is commendable. Abilities are mapped to console buttons, and it’s important to note that mouse and keyboard are not supported on VALORANT Console. Not all maps are currently available in the game as well.
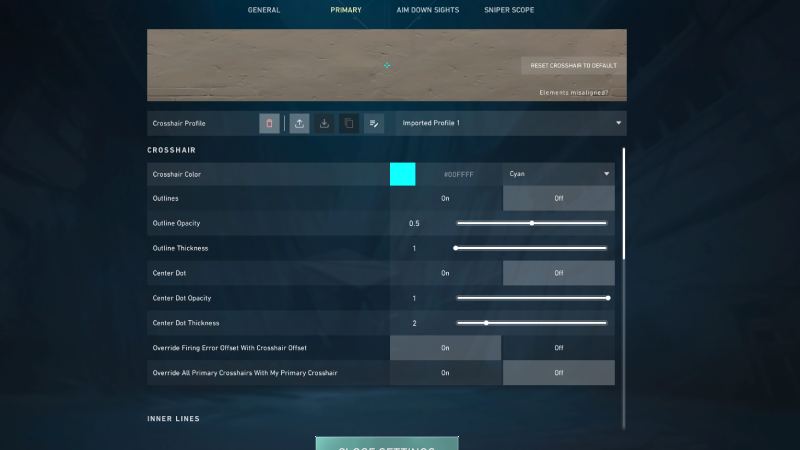
The crosshair in VALORANT Console may differ from that in VALORANT on PC due to the FPS variance between the two platforms. VALORANT Console offers a unique feature called focused aim, allowing players to adjust sensitivity for PC-like aiming. Here are the steps to change the crosshair on your console:
On PS5:
- Press the options button.
- Go to settings.
- Press R1 twice to navigate to the crosshair section.
- Press R3 to access default VALORANT styles.

Image Credits: Riot Games
- Choose from Basic, Funny, Pro Picks, and My Styles.
- Press R1 to view all options.
- For beginners, consider selecting a premade crosshair.
- After choosing, press X.
- To change crosshair color, adjust settings in Base, Focus, Aim down sights, and sniper scope.
On Xbox Series X|S:
- Press the options button.
- Go to settings.
- Press Rb twice to navigate to the crosshair section.
- Press R3 to access default VALORANT styles.
- Choose from Basic, Funny, Pro Picks, and My Styles.
- Press Rb to view all options.
- For beginners, consider selecting a premade crosshair.
- After choosing, press A.
- To change crosshair color, adjust settings in Base, Focus, Aim down sights, and sniper scope.
By following these steps, players can customize their crosshairs in VALORANT Console. For recommendations on the best crosshairs, check out our article on the topic.


